Amazon EKS Auto Mode: A Hands-On Guide
Automate compute, networking, and storage in your Kubernetes clusters with step-by-step instructions.
Introduction
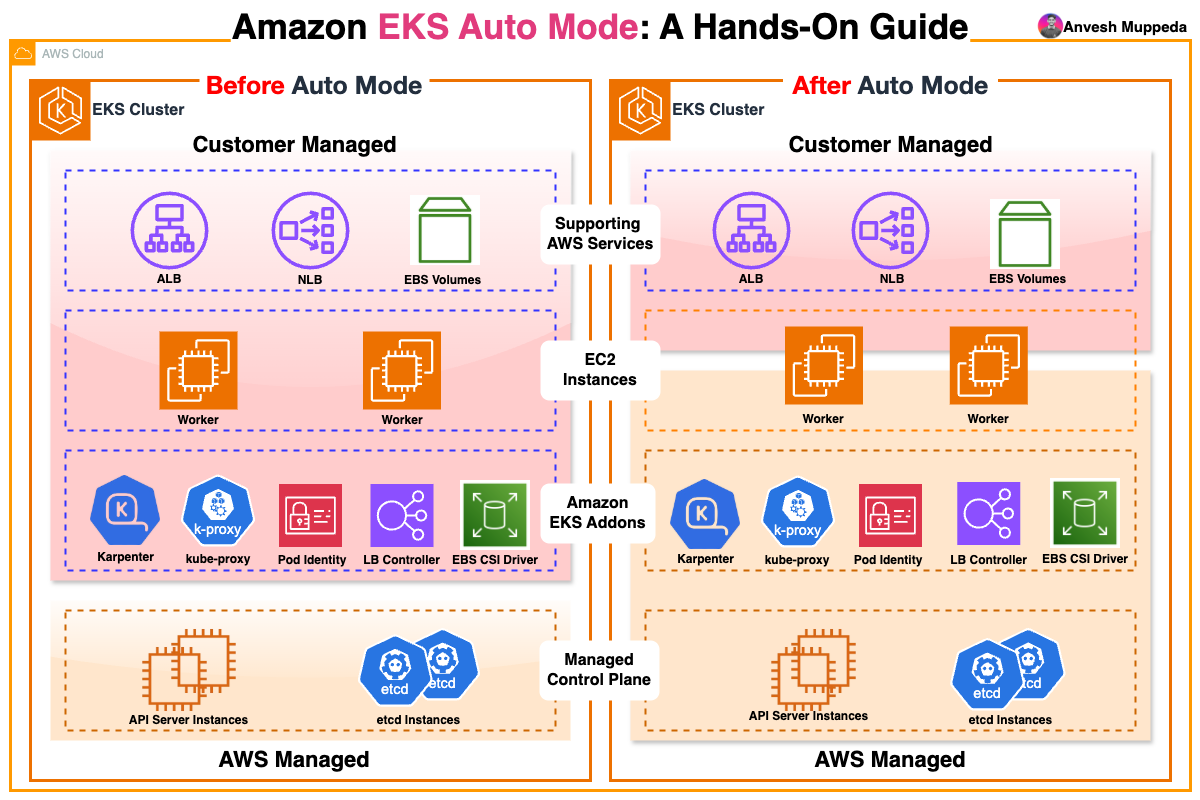
Amazon EKS Auto Mode takes over the heavy lifting of your cluster’s data plane—provisioning and scaling compute, networking, and storage—so you can focus on your applications. In this guide, you’ll learn what Auto Mode does, why it matters, how to enable it (via CloudFormation, CLI or Console), and how to verify it’s working with two simple workloads (nginx and an Alpine writer).
What Is Amazon EKS Auto Mode?
EKS Auto Mode extends AWS’s managed control plane by fully automating:
- Compute: Automatically launches EC2 nodes when pods can’t be scheduled, and drains/terminates under-utilized nodes.
- Networking: Provisions and configures Application and Network Load Balancers for Services and Ingresses.
- Storage: Creates, attaches, encrypts, and cleans up EBS volumes for your PVCs.
Key Features
- Streamlined Operations: Immutable, locked-down AMIs with SELinux and read-only root filesystems; nodes refresh every 21 days.
- Cost Efficiency: Dynamically consolidates workloads to reduce idle capacity.
- Security & Compliance: No SSH/SSM access; regular node cycling and automated patching.
- Managed Add-Ons: Built-in GPU drivers, DNS caching, network policies and EBS CSI—no manual installs.
Prerequisites
- An AWS account with EKS (IAM) permissions
- AWS CLI or
eksctlinstalled & configured kubectlinstalled
1. Create Your Cluster
A. CloudFormation
Use this template eks-auto-mode.yam to spin up an EKS cluster with Auto Mode enabled:
B. eksctl
# eksctl
eksctl create cluster \
  --name my-auto-cluster \
  --region us-west-2 \
  --enable-auto-mode
C. AWS Management Console
- Open the EKS console
- Choose Quick configuration (with EKS Auto Mode – new)
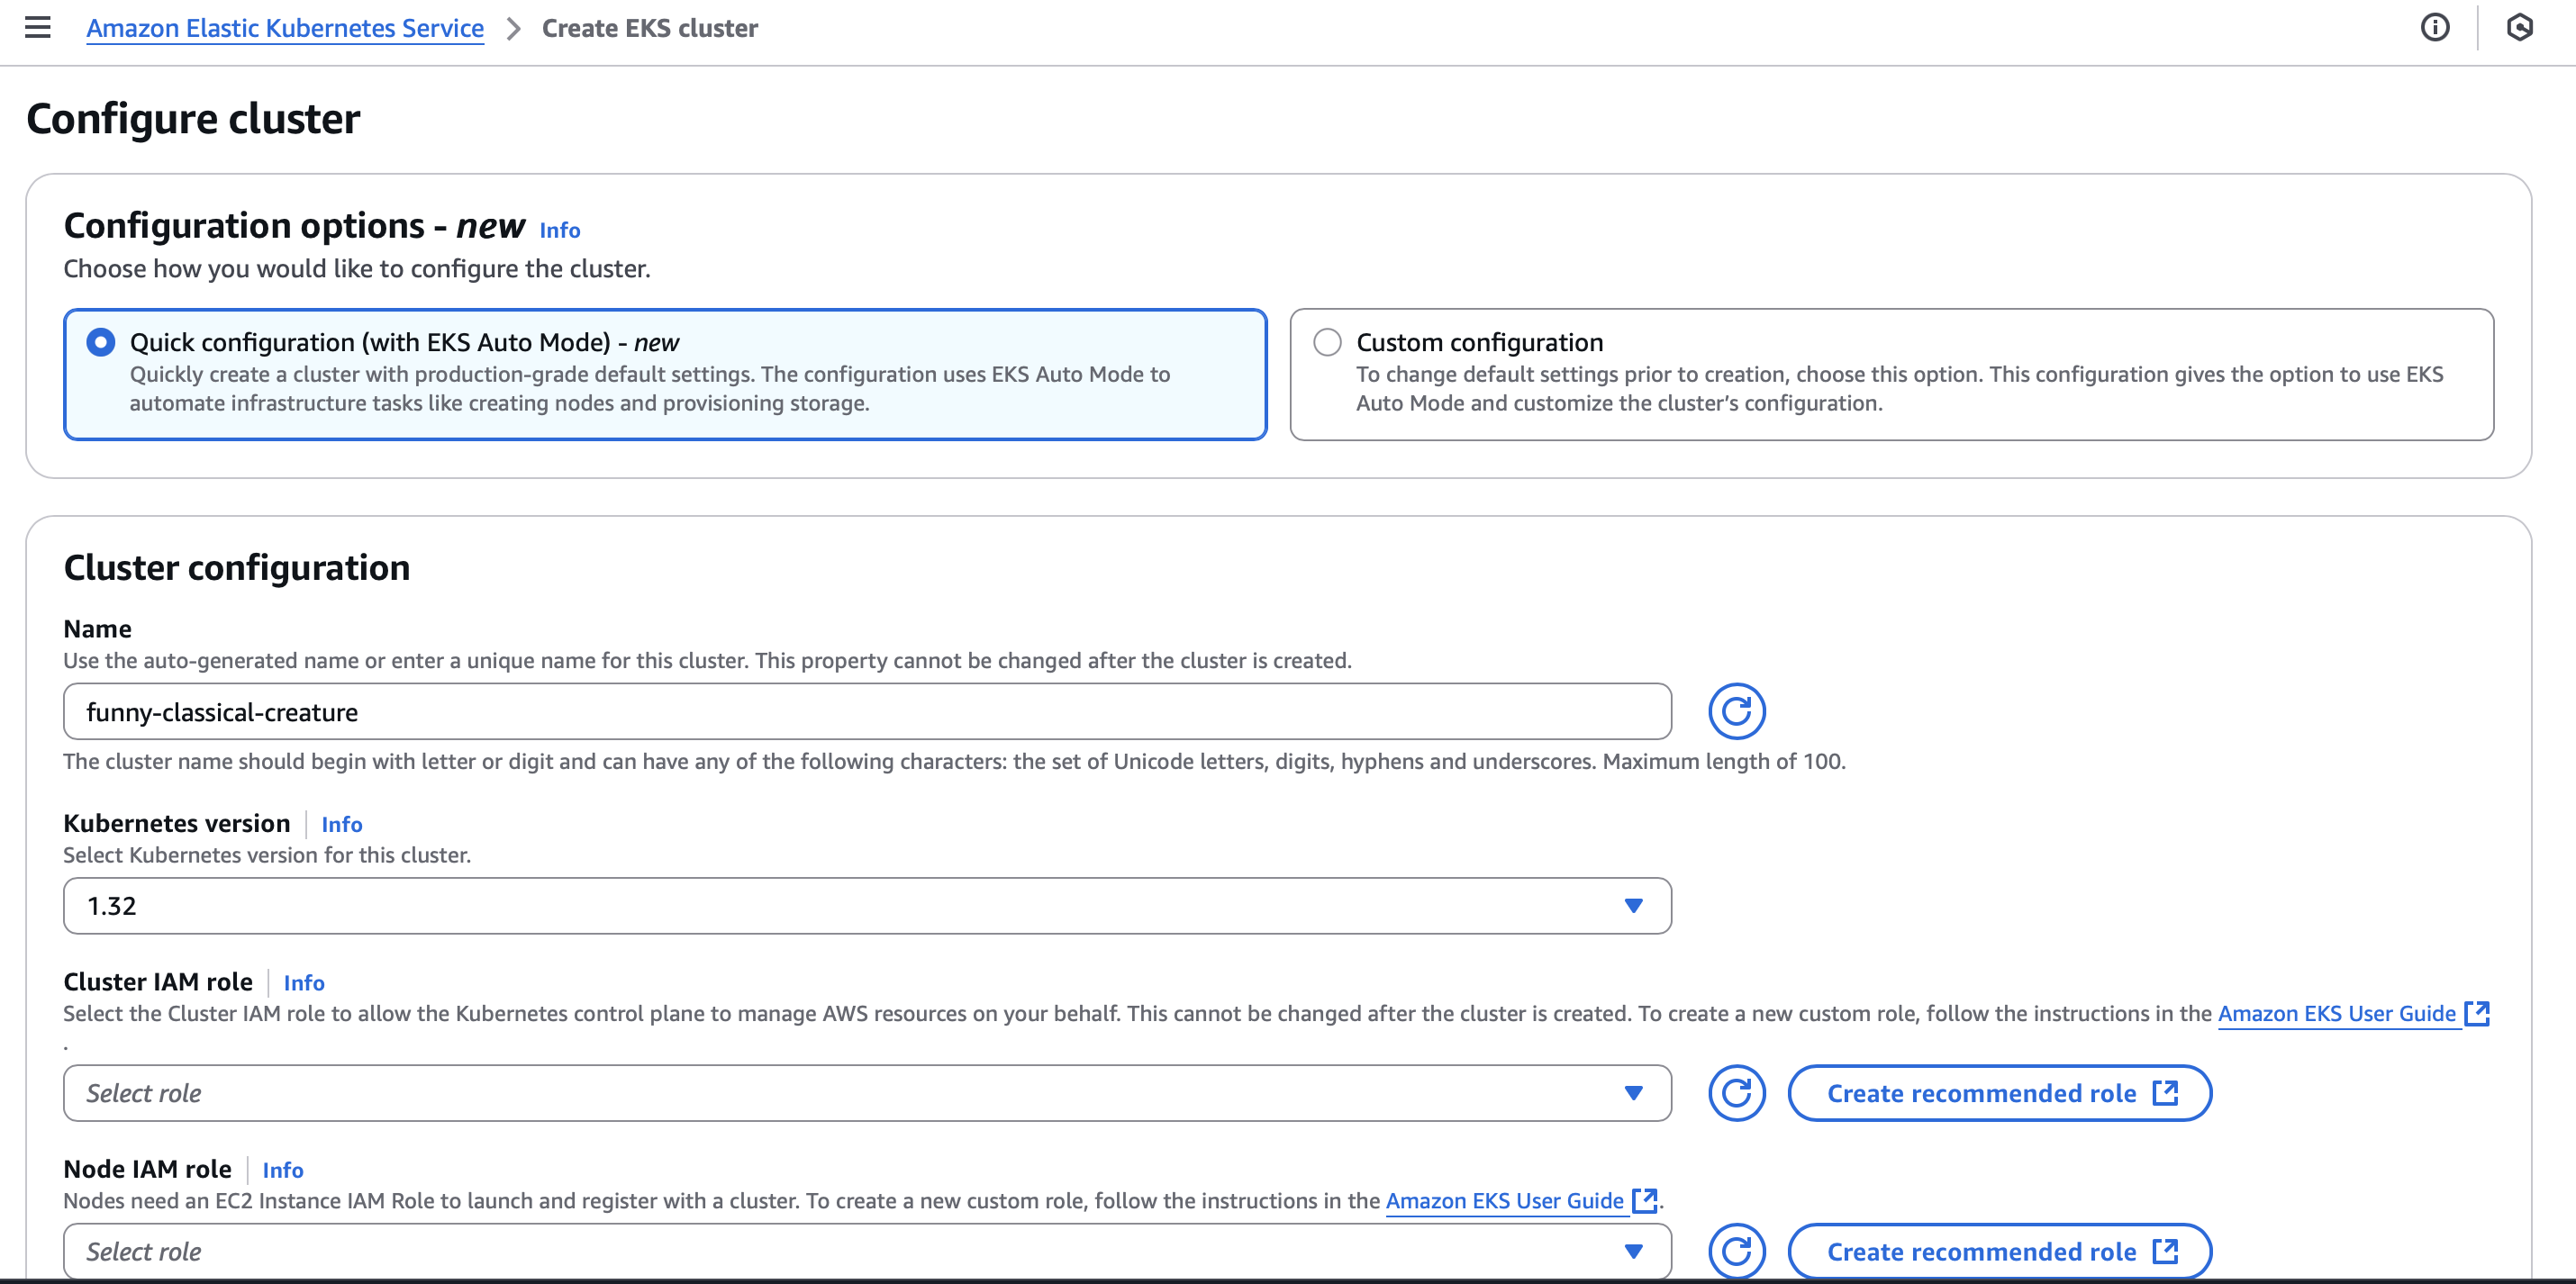
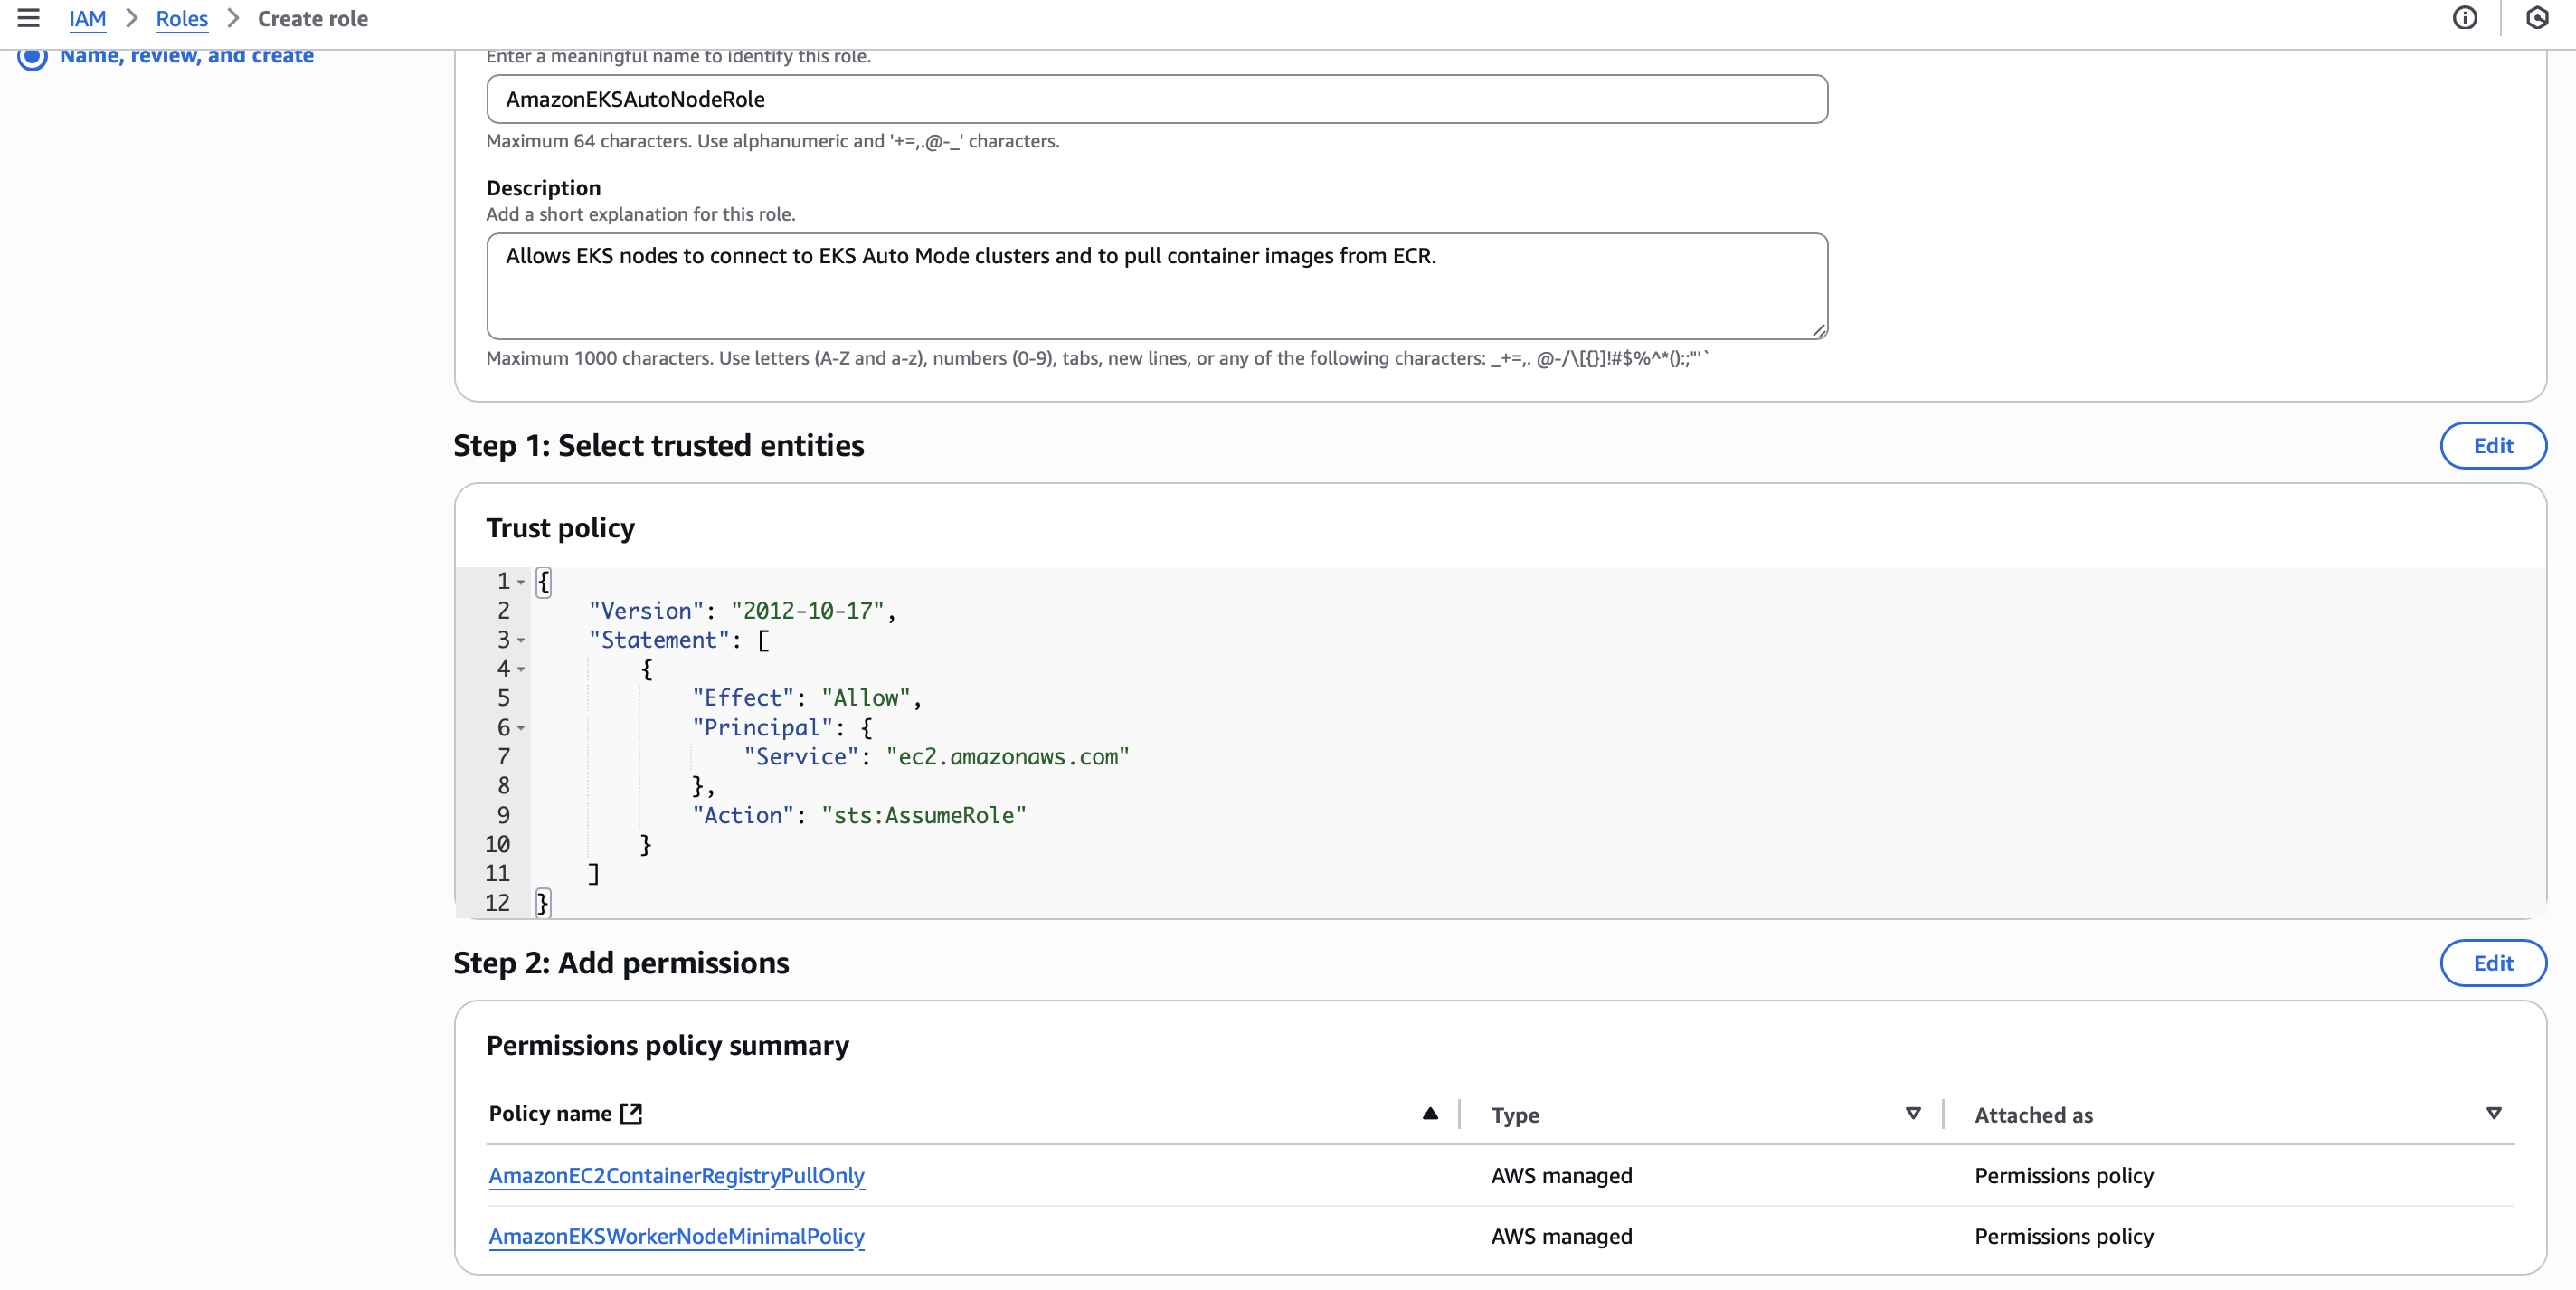
- Create or select the recommended IAM roles for cluster & nodes
Cluster IAM roles are created automatically, but you can customize them if needed.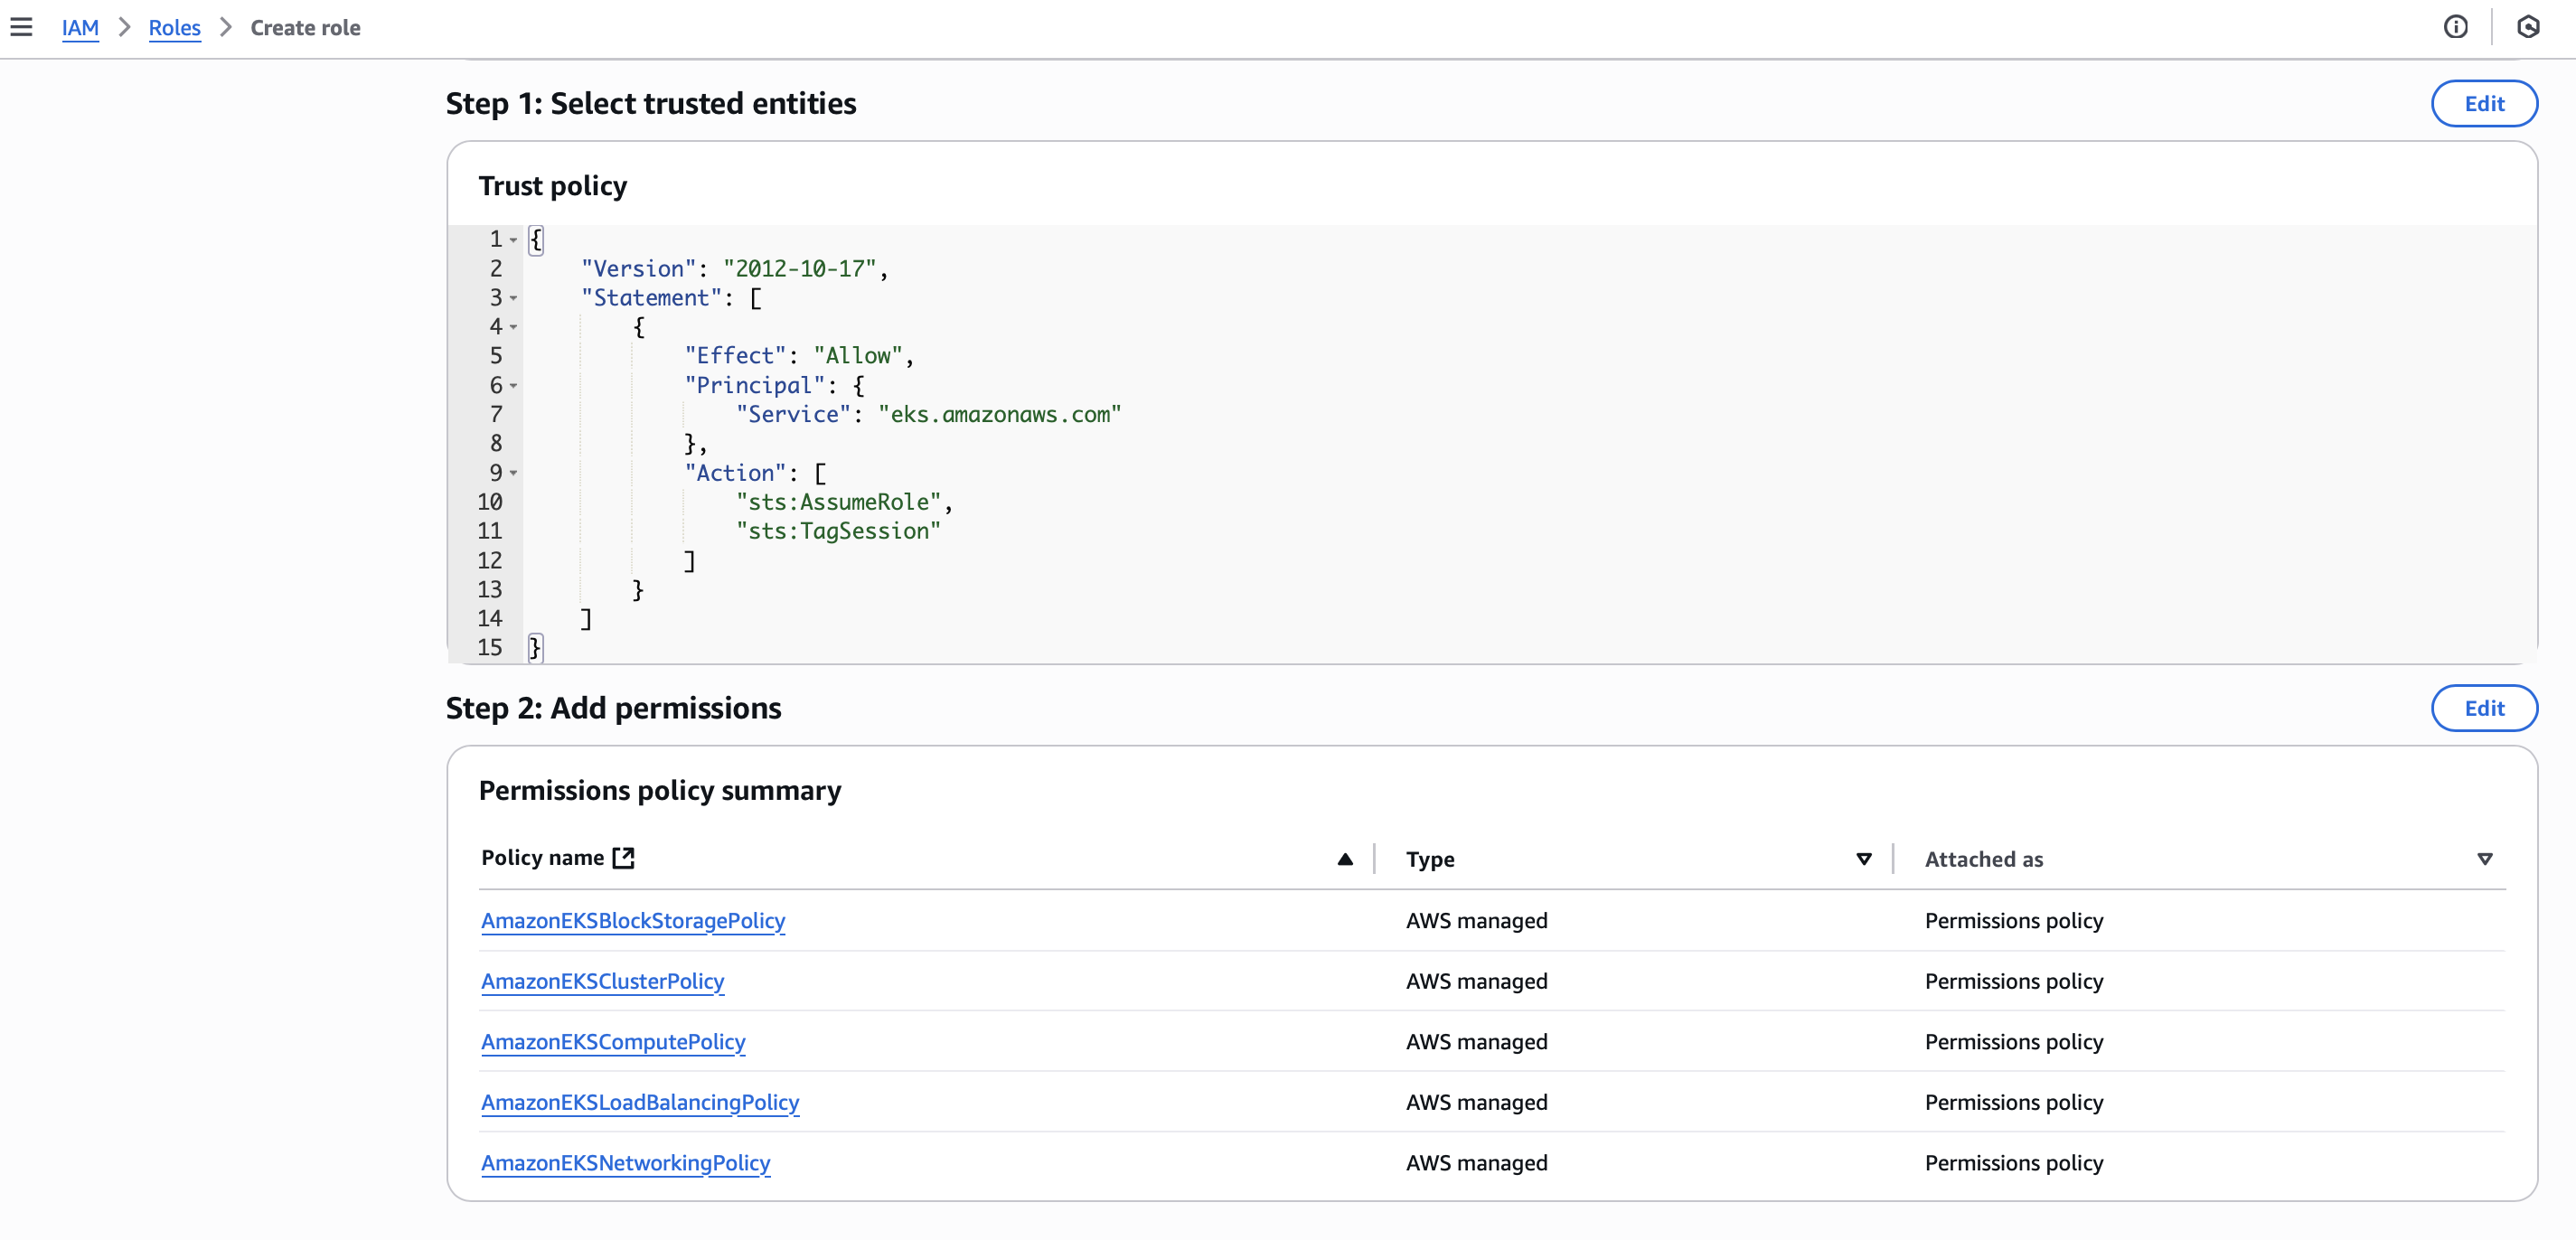 Node IAM roles are created automatically, but you can customize them if needed.
- Fill in VPC, subnets, and other settings
- Review & Create
2. Verify Auto Mode Is Active
-
Configure kubeconfig
aws eks --region us-west-2 update-kubeconfig --name my-auto-cluster -
Check for managed CRDs
kubectl get crd -
Inspect NodePools & NodeClasses
kubectl get nodepools
kubectl get nodeclasses
kubectl get nodeclaims
At this point, no nodes exist until you deploy pods that need them.
3. Test with nginx Deployment
-
Deploy nginx
kubectl create deployment nginx --image=nginx -
Observe a new node spin up
kubectl get pods
kubectl get nodes -
Tear down & confirm cleanup
kubectl delete deployment nginx
kubectl get nodes  # should return “No resources found”
4. Test with Persistent Volume (Alpine-Writer)
Use this manifest (alpine-writer.yaml):
apiVersion: apps/v1
kind: Deployment
metadata:
  name: alpine-writer
spec:
  replicas: 1
  selector:
    matchLabels:
      app: alpine-writer
  template:
    metadata:
      labels:
        app: alpine-writer
    spec:
      containers:
      - name: alpine-writer
        image: alpine
        command: ["/bin/sh","-c","while true; do date >> /mnt/data/date.txt; sleep 1; done"]
        volumeMounts:
        - name: data-volume
          mountPath: /mnt/data
      volumes:
      - name: data-volume
        persistentVolumeClaim:
          claimName: alpine-writer-pvc
---
apiVersion: v1
kind: PersistentVolumeClaim
metadata:
  name: alpine-writer-pvc
spec:
  storageClassName: gp2
  accessModes:
    - ReadWriteOnce
  resources:
    requests:
      storage: 1Gi
  volumeMode: Filesystem
-
Apply the manifest
kubectl apply -f alpine-writer.yaml -
Verify pod and PVC
kubectl get po
kubectl get pvc -
Inspect the underlying volume
kubectl describe pvc alpine-writer-pvc -
Cleanup
kubectl delete deployment alpine-writer
kubectl delete pvc alpine-writer-pvc
5. Customization & Tips
- Custom NodePools / NodeClasses Create additional NodePools for Spot instances, GPU workloads, or specialized storage without editing the defaults.
- DaemonSets Use DaemonSets to inject logging, monitoring, or security agents across all nodes.
- Unsupported Features Auto Mode currently doesn’t support per-pod security groups, advanced AWS CNI options (warm IP pools, prefix delegation), or custom ENI configurations.
Conclusion
With EKS Auto Mode, the cluster’s data plane becomes a fully managed appliance: nodes, networking, and storage spring to life only when needed, then retire when idle—all underpinned by AWS best practices. By following the steps above, you’ll have a production-ready EKS experience in minutes, complete with automated scaling, patching, and security.